本文由大漠根据John W. Long的《Sass 3.3 MAPTASTIC MAPLE》一文所译,整个译文带有我们自己的理解与思想,如果译得不好或不对之处还请同行朋友指点。如需转载此译文,需注明英文出处:http://thesassway.com//news/sass-3-3-released,以及作者相关信息。
——作者:John W. Long
——译者:大漠
今天我们非常高兴向大家宣布Sass 3.3 (又称为MAPTASTIC MAPLE)正式发布了。有超过500个提交和35+新特性,可以说他是一个效的发布。
为了更容易理解一些,我在本文中总结了一些Sass 3.3的新特性,下面我们依次来了解:
新的Map data结构
Sass 3.3这次发布,最显著的特点就是添加了新的Map data结构!如果你使用过类似于JavaScript或Ruby这样的正规程序语言,你可能知道Map有时也称为Hash。它常常是以"关键词/值"(key/value)成对出现:
$colors: (
  header: #b06,
  text: #334,
  footer: #666777,
);
你可以通过map-get()函数映射出对应的值:
.header {
  background-color: map-get($colors, header);
}
Map也可以用来替代关键参数:
$adjustments: (hue: 5deg, lightness: 10%);
$color-1: adjust-color($color-1, $adjustments...);
$color-2: adjust-color($color-2, $adjustments...);
如果你想了解Sass的map更多的信息,你可以阅读修改日志和Jason Garber的博文《Sass Maps Are Awesome!》。此外,如果你对Sass的Map语法演变过程感兴趣的话,你可以从Github中精彩讨论中了解,你也可以提出你的想法。
扩展阅读
- Add a map data type to Sass
- Sass Maps Are Awesome!
- Using lists with Maps in Sass 3.3
- Setting a typographic scale with Sass maps
- Sass List Maps
Sass source maps
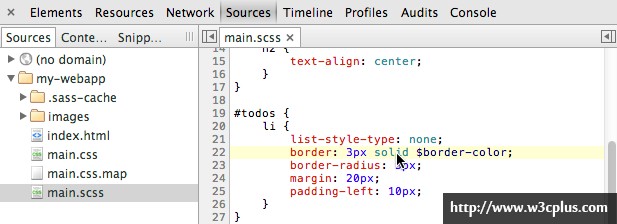
"Sass source maps"是Sass 3.3中的一个热门新功能,可以让浏览器查看Sass源文件,来替代编译好的CSS文件(目前仅在Chrome浏览器中可运行)。如果你配置正确的话,可以在浏览器中编辑你的SCSS文件,并且实现文件同步保存,是不是很酷!

我没有太多的时间在本文中详细描述他是如何工作的,但你可以阅读Google文档中的《Working with CSS Preprocessors》一节或者阅读Sam Richard写的教程《Debugging Sass With Source Maps》。或者你想更直观的了解,可以观看Chris Eppstein的视频《The Mind-blowing Power of Sass 3.3》(在这个视频中介绍了许多Sass 3.3的新功能)。
扩展阅读
- SASS调试
- Source Maps 101
- Chrome DevTools Revolutions 2013
- Developing With Sass and Chrome DevTools
- Getting started with CSS sourcemaps and in-browser Sass editing
- Enabling Source Maps in Chrome
- How to enable sourcemaps in Sass and Compass
- Demystifying Compiled CSS with Source Maps
- SASS环境配置及Chrome和Firefox调试方法
- SASS Source Maps with Google Chrome dev tools
父选择器后缀
&运算符在Sass社区有着悠久的历史,也倍受喜欢。他可以这样去编写你的SCSS:
// The parent selector in action...
.button {
  &.primary { background: orange; }
  &.secondary { background: blue; }
}

// Output:
.button.primary { background: orange; }
.button.secondary { background: blue; }
它还可以给父选择器添加后缀:
// Ampersand in SassScript:
.button {
  &-primary { background: orange; }
  &-secondary { background: blue; }
}

// Output:
.button-primary { background: orange; }
.button-secondary { background: blue; }
以前在Sass中这样使用的话是会报错的,不过现在不会了。
在Sass 3.3中,
&运算符将让你能更好的把Sass和BEM接合在一起。我们来看一个简单的示例:
//Sass 和 BEM结合

.menu {
  color: green;

  &__layout {
    display: inline;

    &-item {
        display: inline-block;
    }
  }

  &__item {
    &_state_current {
        font-weight: bold;
    }
  }
}

//Outpu:

.menu {
  color: green;
}
.menu__layout {
  display: inline;
}
.menu__layout-item {
  display: inline-block;
}
.menu__item_state_current {
  font-weight: bold;
}
根据BEM的命名原理,我们在Sass可以定义两个@mixin:
@mixin e($name) {
    &__#{$name}{
        @content;
    }
}

@mixin m($name) {
    &--#{$name}{
        @content;
    }
}
而在实际调用中,我们可以这样调用:
.speech-bubble {
    color: purple;

    @include e(header){
        color: orange;
    }

    @include e(text){
        color: black;

        @include m(link){
            color: green;
        }
    }

}
编译出CSS:
.speech-bubble {
  color: purple; }
.speech-bubble__header {
  color: orange; }
.speech-bubble__text {
  color: black; }
.speech-bubble__text--link {
  color: green; }
扩展阅读
- Sass3.3新特性之连体符&
- Sass中连体符(&)的运用
- Referencing parent selectors using the ampersand character
- Thoughts About SCSS and BEM
- Even Easier BEM-ing with Sass 3.3
新的@at-root命令
Sass 3.3加入了一个新的指令,可以让你的嵌套更深,只要在选择器前面加上一个@at-root,它将会忽略所有父级选择器:
.message {
  @at-root .info { color: blue; }
  @at-root .error { color: red; }
}
编译出CSS:
.info { color: blue; }
.error { color: red; }
@at-root命令还可以用于一个块,这也意味着,前面的示例可以写成:
.message {
  @at-root {
    .info { color: blue; }
    .error { color: red; }
  }
}
默认情况下,@at-root可以跳出所有嵌套的选择器,但他也可以移出@media或者@support区块,例如:
@media print {
  .page {
    width: 8in !important;
    @at-root (without: media) {
      width: 960px;
    }
  }
}
编译出的CSS如下:
@media print {
  .page {
    width: 8in !important;
  }
}
.page {
  width: 960px;
}
扩展阅读
改善if()语句
如果你不是Sass的忠实爱好者,你可以没有用过@if()语句,但在Sass中确实有这样的条件语句存在:
@if (condition) {
  ...
} @else {
  ...
}
这是一个多行条件语句,但是if()也有简单的结构:
$variable: if(condition, result-when-true, result-when-false);
在大多数情况之下,这个条件语句如何工作是相当的明了。不幸的是,这个在Sass的老版本下会导致错误。要明白我的意思,其功能:
@function my-function($args...) {
  // 第一个参数赋值给$param-1
  $param-1: nth($args, 1);

  // 如果有第二个参数将传给$param-2,否则将是一个空的列表:
  $param-2: if(length($args) > 1, nth($args, 2), ());

  ...
}
在上面的示例中,如果我们传递两个参数给函数my-function(),那么第二个参数会传递给$param-2。如果我们只给函数my-function()传递一个参数,将会把一个空的列表传递给$param-2。或者,这就是我们想要的目的。
在Sass的以前版本中,如果只有一个参数传递给nth($args, 2)将会报错。此外,只有一个参数传递给nth($args, 2)时,试图在$args中遍历而无法找到报错。
在旧的Sass版本中,他是这样工作的:
- 当为真时评估结果
- 当为假时评估结果
- 如果
conditional为真时,返回result-when-true - 如果
conditional为假时,返回result-when-false
Sass 3.3中的if()更像条件语言,其工作方式是:
- 如果
conditional为真时,评估结果并返回result-when-true - 如果
conditional为假时,评估结果并返回result-when-false
对于大多数人来说,这并不能帮你在编写Sass的时候有太多的变化。但对于熟悉Sass的用户来说,if()的改进会让你编写Sass更高兴。这也非常感谢Chris Eppstein才有这样的功效。
向后循环的@for语句
一个显著可喜的变化是Rob Wierzbowski写的@for循环,实现向后循环的能力:
@for $i from 5 to 1 {
  .span:nth-child(#{6 - $i}) { content: $i; }
}
编译出来的CSS:
.span:nth-child(1) {
  content: 5; }

.span:nth-child(2) {
  content: 4; }

.span:nth-child(3) {
  content: 3; }

.span:nth-child(4) {
  content: 2; }
在以前这样操作是无任何输出。
在
@for循环上,在Sass3.3中可以使用@for <start> to <end>,还可以使用以前的@for <start> through <end>。两者的区别是:使用@for ... to ...结束的数不是<end>值,反之使用@for ... through ...结束的数还包括<end>值。仔细看下面的示例:
//SCSS
@for $i from 5 to 1 {
  .span:nth-child(#{6 - $i}) { content: $i; }
}

@for $i from 5 through 1{
  .span:nth-child(#{6 - $i}) { content: $i; }
}

//Output CSS

/*from 5 to 1*/
.span:nth-child(1) {
  content: 5; }

.span:nth-child(2) {
  content: 4; }

.span:nth-child(3) {
  content: 3; }

.span:nth-child(4) {
  content: 2; }

/*from 5 through 1*/
.span:nth-child(1) {
  content: 5; }

.span:nth-child(2) {
  content: 4; }

.span:nth-child(3) {
  content: 3; }

.span:nth-child(4) {
  content: 2; }

.span:nth-child(5) {
  content: 1; }
@for ... to ...除了以降值循环之外,还可以升值循环:
@for $i from 1 to 5 {
  .span:nth-child(#{0 + $i}) { content: $i; }
}
编译出CSS:
.span:nth-child(1) {
  content: 1; }

.span:nth-child(2) {
  content: 2; }

.span:nth-child(3) {
  content: 3; }

.span:nth-child(4) {
  content: 4; }
@each循环中的多参数
Sass3.3中另一个改进可能很容易被忽略,那就是@each循环中可以同时配置多个参数。这是什么意思呢?我们来看一个简单的示例:
$animals: (puma, black, default),
          (sea-slug, blue, pointer),
          (egret, white, move);

@each $animal, $color, $cursor in $animals {
  .#{$animal}-icon {
    background-image: url('/images/#{$animal}.png');
    border: 2px solid $color;
    cursor: $cursor;
  }
}
编译出CSS:
.puma-icon {
  background-image: url("/images/puma.png");
  border: 2px solid black;
  cursor: default; }

.sea-slug-icon {
  background-image: url("/images/sea-slug.png");
  border: 2px solid blue;
  cursor: pointer; }

.egret-icon {
  background-image: url("/images/egret.png");
  border: 2px solid white;
  cursor: move; }
当你在列表中遍历列表对应项时,在@each中可以配置多个参数可以说是一个利好的消息。@each可以基于元素的子列表上遍历出对应的值。
来简单看我们示例中循环步骤:
- 第一次遍历出:
$animal: puma,$color: black,$cursor: default - 第二次遍历出:
$animal: sea-slug,$color: blue,$cursor: pointer - 第三次遍历出:
$animal: egret,$color: white,$cursor: move
可以查看Sass文档中@each多参数章节,可以了解更多的相关信息。
扩展阅读
- 了解Sass的控制命令
- sass揭秘之@if,@for,@each
- Sass control directives: @if, @for, @each and @while
- Control Directives
还有很多,很多!
这些都是Sass新特性,只是最新版本的亮点。你如果想了解完整的变化,你需要自己阅读更新日志。
喜欢视频吗?这有Chris Eppstein大神录制的视频:《The Mind-blowing Power of Sass 3.3》。
由于视频放置在YouTube上面,所以大家都懂的。需要看的自行想办法。——@大漠
译者手语:整个翻译依照原文线路进行,并在翻译过程略加了个人对技术的理解。如果翻译有不对之处,还烦请同行朋友指点。谢谢!
如需转载烦请注明出处:
英文原文:http://thesassway.com/news/sass-3-3-released
中文译文:http://www.w3cplus.com/preprocessor/sass-3.3-maptastic-maple.html